Parking bollard.
Parking Bollard bought from Screwfix, used and in working order, some slight cosmetic wear and tear. No fixings supplied. 3 Available – Original Price £79.99

Parking bollard.
Parking Bollard bought from Screwfix, used and in working order, some slight cosmetic wear and tear. No fixings supplied. 3 Available – Original Price £79.99
Slight cosmetic wear and tear. Buyer should see. City centre location for viewing.
Spare parts if required still available online, link to Ramsay website; search for Original Ramsay Loft Ladder – AL
Item is sold as seen.

AL5 Ramsey Ladder
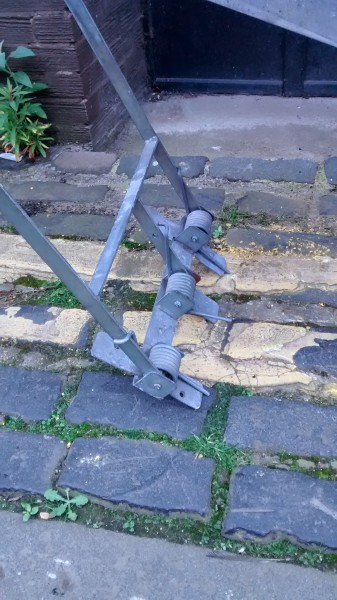
AL5 Ramsey Ladder -hinge detail
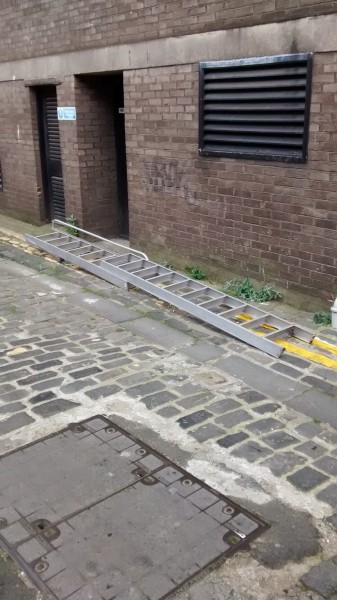
AL5 Ramsey Ladder – Ladder extended

AL5 Ramsey Ladder – folding hinge
Handy David – Edinburgh Handyman services recently completed 4 feature walls in a new property adding a whole new depth of individuality to the rooms,
Nursery decorated in ‘What a Hoot’ by Harlequin

Nursery wallpaper

What a Hoot – Harlequin Wallpaper
Dining room decorated in ‘Little Trees’ by MissPrint
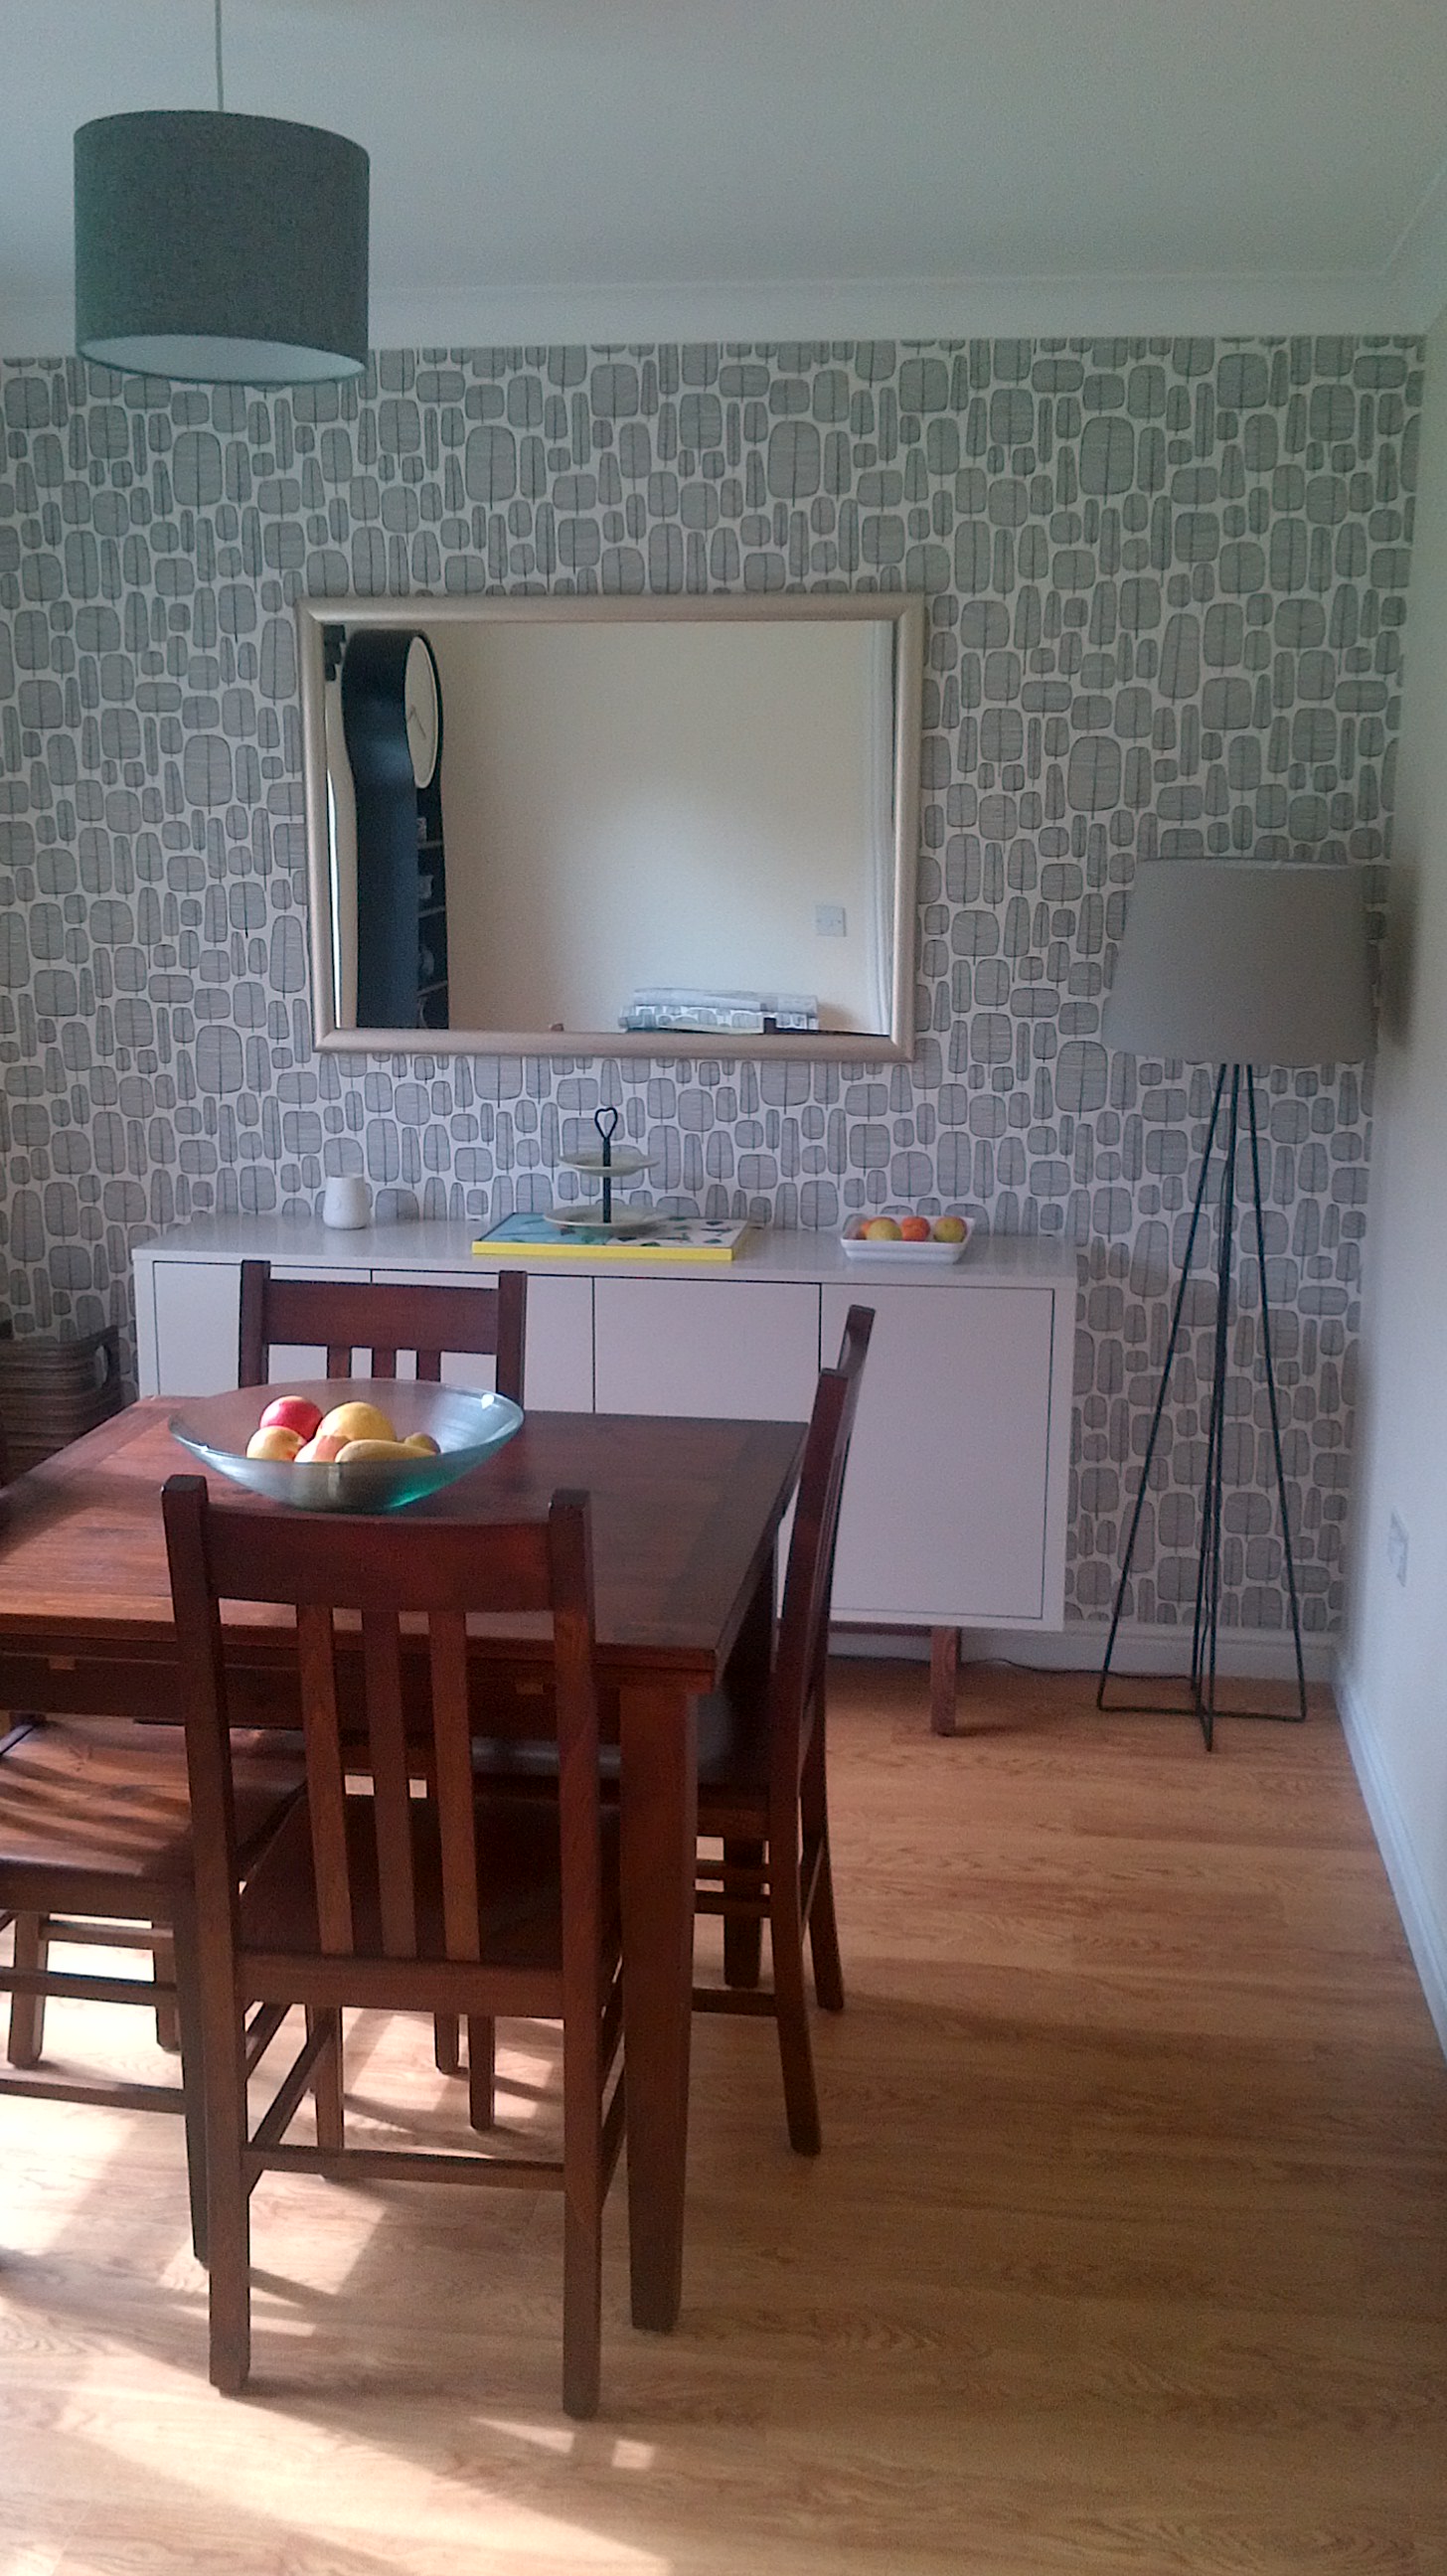
dining room wallpaper – Little Trees by MissPrint

Little Trees Wallpaper – MissPrint
WC decorated in ‘Travel’ by Colours (B&Q)
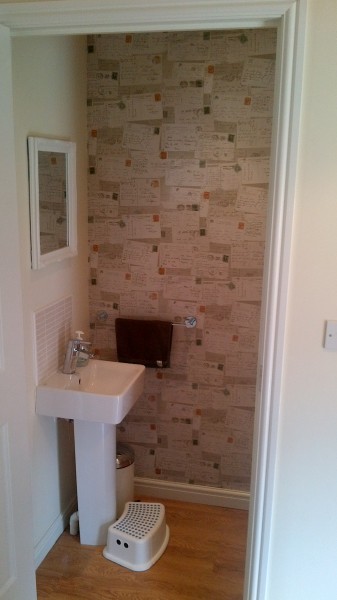
WC wallpaper – Travel by B&Q

Travel Postcards – B&Q
Bedroom decorated in a grey small cubed pattern wallpaper.
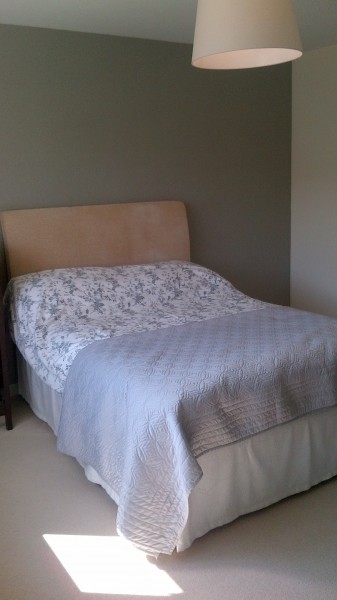
Bedroom Decoration – Grey Wallpaper
Installation of Ikea Kitchen
Handy David – Edinburgh Handyman installation of ikea Kitchen in Edinburgh
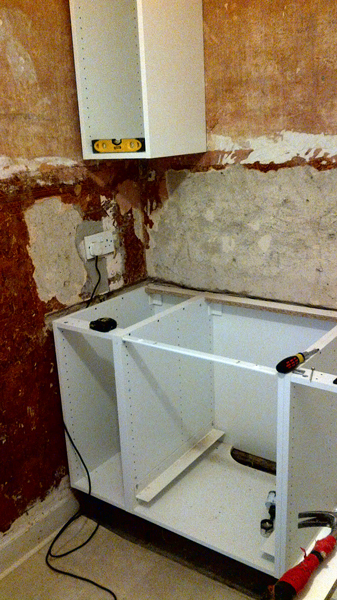
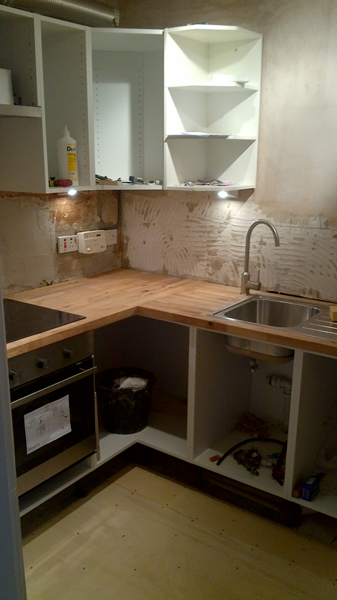
The Ikea kitchen in this instance was designed by the client and the room had been emptied to create a blank canvas for the installation of the new Ikea Kitchen.
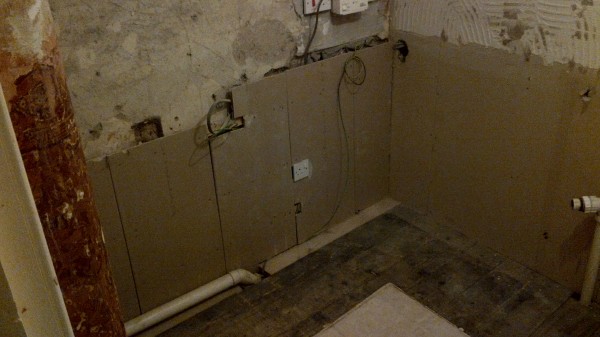
Empty Room ready for Ikea Kitchen Installation

Empty Room ready for Ikea Kitchen Installation
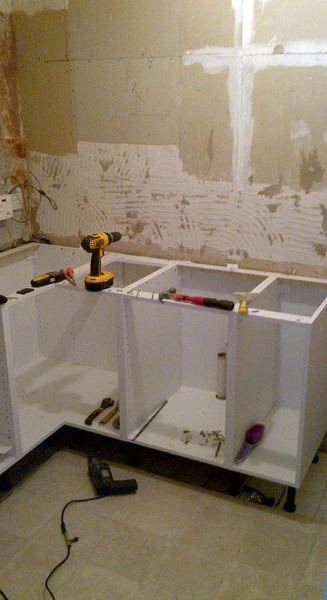
The first step was to assemble all the ikea flat pack units and install into kitchen and attach all units to each other and firmly attach to the wall.

Ikea Corner base unit installation
Ikea Base units for Sink
Installation of wall units and oven Base unit
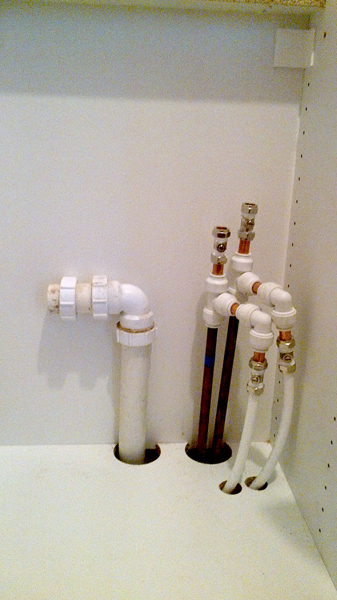
Pipe fittings were installed to service the new washing machine in the small adjoining utility room, isolation valves and speedfit plastic piping was fitted under the kitchen units.
Plumbing fittings
After fitting base units, the walls and ceiling required plastering before fitting of solid wooden work-surface and kitchen appliances, including ikea hob (BARMHÄRTIG), ikea oven (REALISTISK), ikea cooker hood (UTDRAG), and ikea kitchen sink (BOHOLMEN) and tap (RINGSKÄR)
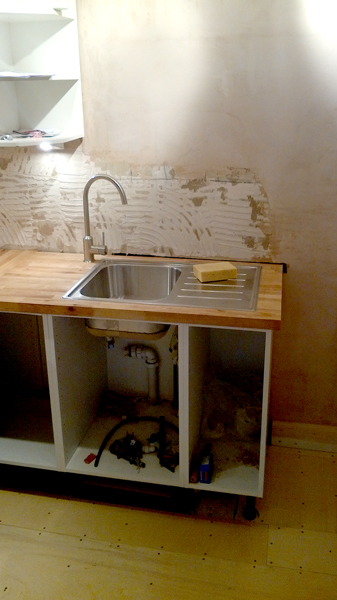
Ikea kitchen sink
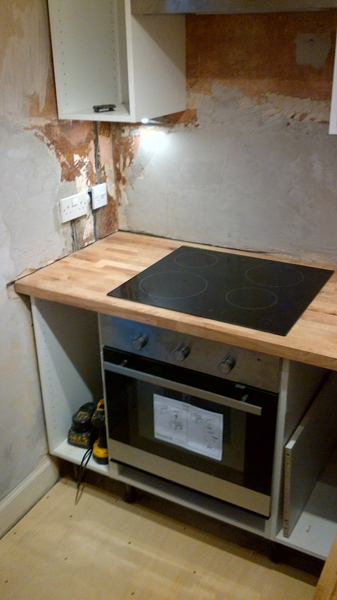
Ikea Hob and Oven
Ikea Solid Wooden Worksurface
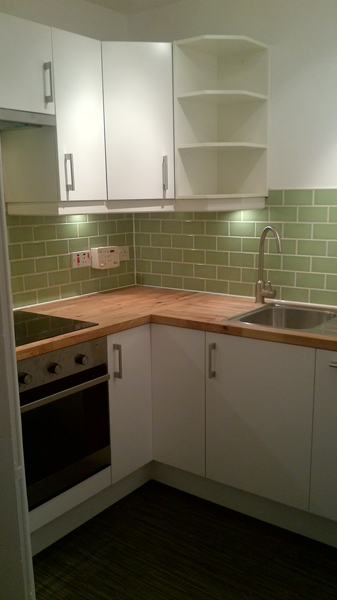
Finished Ikea Kitchen with brickwork tiles
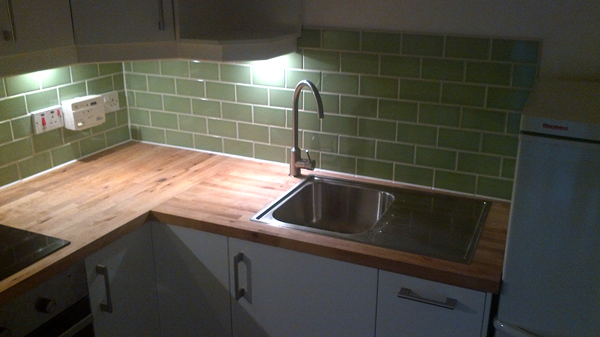
Tiled walls in ikea kitchen and under counter lighting
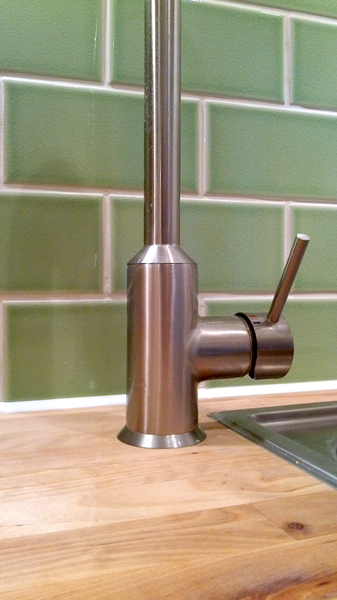
Ikea Kitchen tap
Cracked Glaze tile splashback
Empty room before installation of Ikea coffee station.
Handy David – Edinburgh Handyman Services – Kitchen assembly
Tasked with assembling a set of kitchen units and small fridge, this is to be used as a Coffee Station in an Office, it required some extra work in the case of the wall having an existing section of paneling which was not to be damaged.
The first step was to assemble the Ikea Kitchen Unit Carcasses. Once the Ikea units were assembled it was then a case of measuring up the wooden paneling to determine how much had to be cut away.
Measurements for cutting segment of Ikea kitchen unit.

Ikea kitchen unit trimmed to fit over paneling

Ikea kitchen units and Ikea small fridge
After the Base units were installed and secured to the wall the worksurface could be measured and fitted in place. and then the doors, drawers and shelves could be fitted. The shelves in this case had to be trimmed to fit the reduced depth of the unit. Silicone was also applied around the edge of the work-surface.

Ikea kitchen units and Ikea small fridge with doors and worktop

Ikea kitchen units and Ikea small fridge as finished coffee Station

Ikea kitchen units and Ikea small fridge with drawer and shelves
To finish off the end of the Coffee station a matching end piece was required and this had to be cut to match the profile of the paneling, more accurately that the carcass as it would be clearly visible and therefor a neat finish was required. Small imperfection would be hidden by the silicone seal.

Ikea kitchen Unit end panel measurements

Ikea end panel Cutting

kitchen end panel cut to fit and sealed with Silicone
The final task to be completed was to cut a hole in the work-surface to allow cable to be plugged in for the coffee machine, and to fit he kick-boards at floor level.

Ikea Kitchen Units as finished coffee Station
Repair to a tenement stairwell which had suffered water damage causing the existing plaster to crumble, blister and fall off the wall.

Tenement flats stairwell

Water damage on tenement flat stairwell

Wooden corner beading
The aim was to repair and re-instate to match the undamaged section of stairwell.
The first task was to remove all the loose plaster and paint all exposed areas with pva glue to seal all the dust and create a sound surface onto which Undercoat plaster could be applied. On the corner all the old plasterwork had to be removed and plasterboard was glued to the wall to reduce the amount of plaster required.

Section with plaster removed

Corner section with plaster removed

Areas on corner filled with bonding plaster

Section filled with bonding plaster

Patched corner section
Once the undercoat (bonding) Plaster was dry the wall was again painted with a pva primer and then skimmed with finishing plaster.

Wall completed with finishing plaster

Corner section plastered
Once dry the wall could be sealed with emulsion, then gloss paint was applied to the lower half (2 coats), finally, 2 stripes were applied using masking tape as a mask.

Colour matched Paintwork – original paint on left

Completed stairwell – Paint colour matched
Every now and again, the front door needs a little TLC, but if it’s been a bit longer, then it might need a bit more elbow grease and effort.

Front door sanded prepared for painting.
The door in this case was a brown varnished door where the varnish was peeling and weathering, the end goal was to have a coloured door.
The first job was to prepared the surface of the door, this was started by removing the door furniture and filling and holes or major imperfections with a good quality filler. The door could then be sanded thoroughly to create a smooth surface and provide a key for the paint.

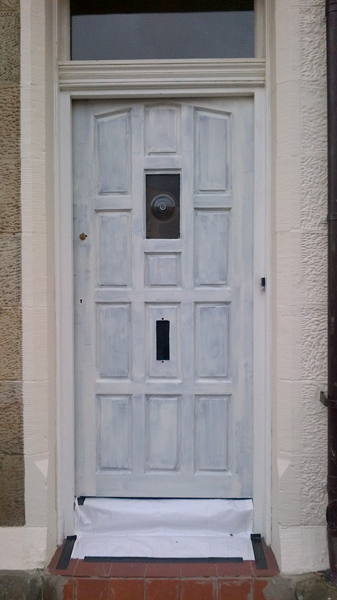 The door was then ready for 2 coats of white undercoat, allowing sufficient time for drying between coats and sanding out any imperfections or any lifted grain.

Door painted with Crown Tibetan Gold

Crown Tibetan Gold
‘Crown: Non Drip Gloss Tibetan Gold’
The Top coat of the chosen Colour, in this case
Two coats are applied again leaving sufficient time between coats and sanding lightly for a good key.
When the door has dried fully, new door furniture and old fittings are replaced.
Wallpapered a large new town room recently with some fantastic ‘Cole & Son’ wallpaper.
Really great wallpaper to work with, paste the wall on this occasion which makes cutting and trimming the paper much easier.

Wallpapering materials

Cole & Son Wallpaper on mantlepiece
I couldn’t help feeling this chap was being a little over-critical!
Finished article has a very cosy, enclosed feel to it.

Site Supervisor!

Finished room decorated with ‘Cole & Son’ Wallpaper
Bath Re-tiling. In this case the tiles were old and the grouting had failed at the shower end of the bath. As a result the board behind the existing tiles had rotted and gone mouldy.
Once all the tiles had been removed I removed the rotten board and replaced with a cement tile backing board which is far more resistant to damp.
The bath could then be re-tiled and grouted and then the shower screen could be put back and all edges sealed with silicone.
Click on images below for a slideshow.
Mouldy wood behind old tiles

Damaged board Removed

Water resistant Cement Board installed

Tiling new tiles around Shower fitting

Tiling remainder of bath

Tiling grouted and finished with screen back in place and silicone work done

Detail of glass trim tile
Bring a bit of life back to a weathered garage door.

Sunny weather is always handy!
1. Scrape off any blistered, cracking or loose paint.

Scrape off and blistered, cracking or loose paint.
2. Sand entire door to provide key for new paint, paying particular attention to sanding down any rough edges where larger sections of loose paint have been removed.

Sanding down the garage door to provide a good key.
3. Remove all loose loose debris and wipe down surface with white spirit.

Clean surface in preparation for painting.
4. Paint first coat of paint when the white spirit has dried and allow time to dry before second coat. It is best to give a light sanding before applying a second coat. Drying times may vary depending on weather conditions and type of paint used – always read the tin carefully. In this instance I used Fortress metal paint which required no primer and coated over the original colour very well.

Paint first coat of paint.

Image for illustration purposes only
5. Apply second coat and put on a pair of shades as it was particularly sunny that day!!

Painted Garage Door finished with 2 coats of paint.